Pages - Menu

Aug 31, 2016

DIY WAX DIPPED GRUNGY CANDLES


A while back at the auction house, I won four large totes of nothing but candles. I mean little candles, big candles, tea lights and all. I gave $7.00 per tote. Just take a look at these totes below.


Seriously, there's layers of candles in each. So I know I have enough for crafts for a while.

So to get started selling some for profit from my $7.00 totes, I decided to grungy up a batch of them.
I've done it a few different ways before, 
 ROLL in melted wax method


 Modge Podge Method

  
But this time I wanted a faster way, so I decided to use my candle warmer and an old candle to just dip these in. This will give them a smooth and grungy look.

Oh, I've done this dipping in wax method before with the cinnamon, grungy candy canes too!

 WAX Dipped Candy Canes


But now onto the Wax dipped, grungy candles.

 Just dip the candle down in the melted wax,


 then give it a quick roll in some cinnamon.


And dip it again to set the wax in!


Then just sit it on some wax paper to dry.


I repeated the process on some to give it a more grungy, primitive look. Others I didn't.

And that's it.
How super simple is that?  And I think they look super cute.

Here's a few more pics to see how different the colors turned out.
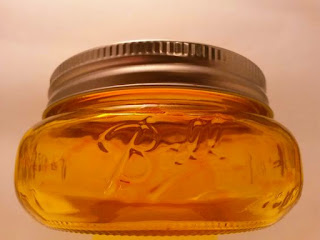
Oh, the candle in a jar that I melted to dip these in was a Fall scented candle, (I can't remember the name,) but it was a melted dark brown.


 I even dipped these long, skinny ones.  But I had to dip one end at a time to get it all coated by using the dipping wax jar.

Remember, if you're gonna use the jar of melted wax also,
just DIP, ROLL and DIP again to set it in.
That's it!

Sorry, right now I don't have any pics of these packaged up. But I think I'm gonna price the votives a pack of 2 for $1.50 or so.  
The grungy tealights maybe 4 for a $1.50 and the tall skinny ones probably 2 for $1.50.  
However I do it, I'm sure to make tons of profit from my $7.00 totes!

Hope this gives ya some ideas and
Remember to Subscribe so you don't miss a post

Aug 29, 2016

SNOWMEN LIGHT UP ORNAMENTS with Names


Here's some cute blinking snowmen ornaments I've made.

I know most people won't have these orange, clip on, safety blinkers on hand for this craft. 

Original before photo
But in case you ever run across them at the Dollar Mart keep this in mind. They are meant to be clipped on to children's backpacks or for runners or walkers for a safety precaution.  But I've made them into blinking snowmen ornaments.

First I strung up a line with twine, as seen above using thumbtacks between my porch posts.
And then I just clipped them on and got ready to spray paint one coat.

I like the Rustoleum brand of spray paint.


I was also spray painting more clothespins for my Snowmen Clothespin magnets also.

And after one coat, (that's why I like the Rustoleum brand,) they were ready to go to the next step.

I took them all in and laid them out on wax paper to protect my table.

And then I Googled "snowmen faces," and looked at the various ones that came up.
I then just sort of mimicked the ones I liked best. I love the ones with the big eyes the best.

Here's how I do it in lots at one time. Don't worry, just go step by step like below and it's not hard at all.
Just dot on some eyes and dots for a beginning. 
Here's a tip. 
I usually dip my end of the brush without bristles into the paint and use that as a great circle for these parts!

And then continue onto more and more.

I had to move into another room, so I moved them onto my big piece of pine work board for easy hauling.
See the one with the mouth open, you can just draw on about anything you want to change up their faces a bit. It gives them their own personality.

And then to the rest of the faces and my favorite parts, the snowmen noses!
I just dip a very long haired brush into the cinnamon orange and let the nose draw out long and taper off. And go back and sometimes make it thicker with another stroke.

Then, you'll just want to remember to add eyeballs and some snow on the noses.
Here's an up close.

Sometimes I add a bit of pink to their cheeks and sometimes I don't. Just if I remember.

I even tried to "grungy up" some of them by adding a layer of Elmers glue over their faces and then sprinkling on cinnamon.  But I didn't like it too much, so I didn't do too many.


Here's a few more shots of a bunch of them.

These are my favorite eyes. I saw them on Pinterest on a lid that was painted and I loved it!


As you see, some of them have names at the top. I had an order for a few so I did them while I was at it.

And here's a few more pics.


And here's what they look like with their light button pushed on. 

They have 3 light settings too. Constant blinking, pulse and a slow glow which is my favorite. 

I tied on some homespun to the top clips after the pics. Just various colors.
I think these will look awesome with the whole families names on a tree all lit up Christmas morning! 
What do you think? 

See ya'll next time,
-Lisa

Aug 27, 2016

DIY NO SEW BURLAP FEED SACKS


These no sew, burlap feed sacks are easy and adds lots of country to any dining room or kitchen.


I ordered some plain, flat burlap bags on ebay,


and then just got out my stamps and ink.


I then stuffed them with the fillings from a new pillow from Walmart.  Oddly, this way lots of stuffing only costed $2.50. It was cheaper than buying a bag of regular stuffing in the craft department.

And to seal up the opened top, I just got out my hand stapler and stapled it right up. 
See, they are barely noticeable.
But if that little bit does bother you, you could always go back and hot glue some jute twine on top of them.


And if you notice the squares around the letters, I guess that is because the burlap was a little thick. I did have a cutting board inside them while they were flat.  To try and help with pressing the stamps, but it didn't turn out how I thought. But I do like the little border squares on the letters after all.


I have them sitting in the dinning room beside an old, round, vintage heating stove.

And here they are again, all finished up and tucked into a slat, apple basket.

Feel free to share anything on this blog with Pinterest and such.
There's a links here and there to make it easier.

Happy Crafting ya'll,
-Lisa


And if you are in the mood for Halloween / Fall themed burlap bags,
 BURLAP PUMPKIN BAGS

And a link to the

Aug 23, 2016

HALLOWEEN THEMED MINI MASON JARS PLUS PUMPKIN MAGNETS


I've really been in the Halloween/Fall mood this week. And these Halloween themed Mason jars with Pumpkin magnets are a great way to give treats without the use of bags.

Or just a fun way to spruce up any area with a bit of primitive Halloween fun.
And as a bonus, the top, 

the pumpkin face is a refrigerator magnet!


Okay, so on to how to make these.
I stained my jars on the outside, here's the link to how I do that.
 I do the staining because I am in love with various colors that are hard to find.

Here is a pic of my orange, hand stained jar:
CLICK TO SEE HOW TO STAIN MASON JARS
 
But I'm sure you could just paint the outside of the jar with a sponge and some craft paint if you wanted. As long as maybe sealing it with a clear coat to save from chipping.

After that, I just got out some craft paint in browns, and painted the shiny lid and ring. 
 The one that will screw onto the jar, not the pumpkin magnet.
I like the burnt umber color a lot.

And then I tied some jute string around the jar with a cute, hand stamped tag. I chose BOO.
 Here it is with the painted lid on it. I had to do two coats of burnt umber.

And then I just stuck on the Pumpkin magnet lid to the top of the jar lid.


And this is how they turned out:
As you see, I also glued a bit of homespun fabric to the pumpkin magnet lid, along with a cute button.
I also added a bit of cinnamon on top of the face, which I sprinkled on top of some Elmers glue. Just to get it to set in.

They are all ready to stuff with candy. 

And remember, since I stain the outside, these jars are food safe.  And since the stain is baked on, they are even safe for washing. Though I'd avoid the dishwasher just in case.

Hope ya'll like these little mini mason jar all decked out for Halloween!
See ya'll later,
-Lisa


SUPPLIES:
I buy the mini Mason jars at Walmart in the canning section.
And the magnets and craft paint I also get at Walmart in the craft section.
The jute twine came from the Dollar Mart and I made my own handstamped tags from the plain Avery tags I found online at eBay.
The swatch of fabric came from my oodles of fabric I've saved over the years. ;-)