Pages - Menu

Showing posts with label craft fair ideas. Show all posts

Dec 24, 2019

Mason Jar Earrings and Dollhouse Mini Mason Jars

Mason Jar Earrings 

and

Mini Wooden Dollhouse Mason Jars


Hey ya’ll!
I usually don’t do these type of posts, but here are some miniature, dollhouse mason jars I’ve recently been tinkering with.
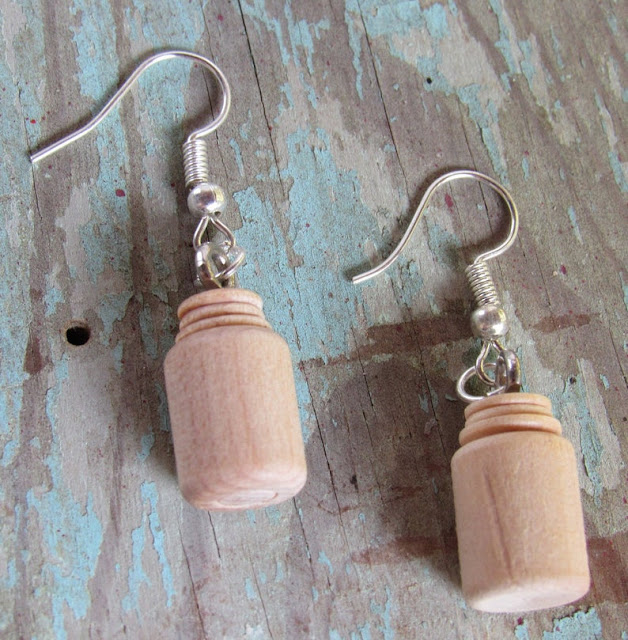
I have also made them into cute Mini Mason Jar Earrings too in my Etsy shop!

When I ran across a listing on ebay for these plain, unfinished, adorable little wooden mason jars, 
I knew I wanted them.  
I just didn’t know what for at that moment.

Well, today, about a year later, I got them out and thought it’d be cute to make some tiny little dollhouse type food for the cupboards. 
And then also made a few Mini Mason Jar earrings too.

I know that dollhouse miniatures are a very popular thing, I just haven’t really ever gotten into them.  
But give me tiny mason jars and I’m there!

So here was my idea.
I just went into Word and Paint on my pc and tinkered around and made some tiny little word labels.


I couldn’t get them to print out small enough, so I eventually had to copy them on my printer/scanner/fax and then resize them.  
I think I tried a 75% first and then eventually had to go down to a 49% to get a good fit.

 I gathered up some supplies:
-Mod Podge
-Scissors
-A Paintbrush


And then I just cut each one out. They were tiny! And I use some Mod Podge to glue them on and an extra coat to seal the outside.

 
And then just let them sit and dry. And wa~la!
Here they are.
 
If you look pretty dang close, you can see I tried to make some green beans, carrots and tomatoes in the right hand corner.  

To kind of give them a different look to make a set of 4. 
The fourth one, I just left plain to say Ball.
I am not sure my usual, craft peeps will be interested in these, but hey, maybe take this label idea and use it on larger items?

I  listed these in my Etsy as earrings.  
And here is a few pics of that:
 Now available in my Etsy shop


Happy Crafting ya’ll!
See ya next time,
~Lisa

Sep 20, 2016

DIY Home Made MOO SHINE MOON SHINE

Are ya'll ready to make some home made Moo Shine?
(Moon Shine lol)


I did. Here is how mine turned out.


These are great items to sell at craft booths/fairs.  They make for cute country gifts at Christmas. Or as a souvenir.

It was hard to photograph water in jar without it being blurry for me.

They also make adorable party favors to take home, especially for country themed weddings!

Here's how I made it.
All you need is a 
-Mason jar with a lid, (I prefer the old metal ones.)
-E-6000 Glue
-Water (from a bottle.)
-Play set with tiny, plastic cows. 

I got the one pictured above from our local Tractor Supply for only $4.99.
Not many cows in it, but I'm going to dab on some black/white spots to a few to make them look like cows.

Just take some E-6000 glue and glue the little cows to the bottom of your empty Mason Jar.
Let them dry overnight.

I used a wire to lower him down. A wire flimsy enough though to remove easily after it dried.


And then just add some bottled water.  I think using bottled water may help from getting that stink smell after it sits for a while. Guess that's the difference. Not positive but I think that's the reason to use bottled water for crafts like this.

And bam, here is your Mason jar full of MOO SHINE!
I used cold, bottled water. I wish I'd used room temperature water so I wouldn't have had the chill in the first finished picture above.


These are great items to sell at craft booths/fairs.  They make for cute country gifts at Christmas. Or as a souvenir. They also make adorable party favors to take home, especially for country themed weddings!


Speaking of "moo stuff." Yesterday was bittersweet. I said goodbye to a few of my farmland friends named, Small, Medium and Large. But I know they've really moved on to greener pastures for sure, as ours were drying up.

"As for butter versus margarine, I trust cows more than chemists." 
~Joan Gussow

Amen! Me too.
~Lisa

Oct 5, 2015

HOLIDAY DOOR GREETERS


These cute, wood and metal shovels are from originally from Tractor Supply and are only $5.99 each. But I won them at a wholesale auction for only $2.00 each!!!! I know right!!


I just had to grab a few since they are bright red and they just screamed Christmas to me.
The brown basket I had on hand because I buy boxes of them at auctions for a few bucks at a time.

When I got them home, here are a few ideas I tried out on them.  And I am going to use one as a door greater.  We call them that when we stand something up, or sit something out by the front door.  Just a pretty something that greets guests.

First I free handed the words "Let it snow," 


and some easy snowflakes from lines and dots like this:


And then I thought about making the basket a holder underneath the shovel. So I too a pair of scissors and started a hole in the basket.  Once started, the shovel went right on through.


And I secured it with hot glue at the base to keep it intact inside and out.


And then I had to start thinking of some holiday things I would place in the basket as decorations.  I just basically started going through my craft supplies and putting this and that in.  I did have about 10 of those green twigs or fillers as I call them, that look like pieces of Christmas tree limbs. 


They are great for things like this. And are $1.00 at the Dollar Tree or you could easily make your own from an old tree!

SHOVEL # 1 "LET IT SNOW"

The candy canes are easily made with homespun.


If you like them, 


And at the bottom of the basket, I also tied a strip of homespun on to cover the hot glue strip.

And here is a second try at another shovel.

SHOVEL #2 JINGLE BELLS

I made this one much more simpler.  Just free handed on the words "Jingle Bells" and snowflakes. 
Glued on some red, metal jingle bells, a red ribbon and perched on a cute red bird in a nest. And stuck on a cinnamon stick as maybe the birdie carried it to work with, lol.


SHOVEL #3 SPARKLY SNOWMAN
I think I liked this one the most. I just love sparkly, shiny stuff at Christmas time, I guess.
As you can see, I kinda used found items, like the tulle, jingle bell snowflake ornament, a wooden snowman and a frosty twig. That was about it.


Oh yes, and the line of red, metal jingle bells down the wooden handle.

I am just going to be sitting one up beside my door, without any type of stand.  Because I don't think one is necessary if you find a good leaning spot.


I priced these for $19.99 in my craft booth, since they are real metal and wooden shovels.  If they would have been plastic, I wouldn't have priced them so high.  But they are really strong feeling.
I kinda felt bad, being as I only had $2.00 each in them, plus the making of them, but I do think they are worth the $19.99 this time.

I priced them for $19.99 each
ALL ARE SOLD
THANK YOU!

Happy crafting until next time ya'll,
~Lisa

Oct 4, 2015

GINGERBREAD MEN CRAFTS

Gingerbread Spoon!

I had about 20 dozen or so of these cute little gingerbread men made of resin, that I won at a wholesale auction.
They had flat backs like so:
I was selling these cute little gingerbread men in my eBay shop, until I started finding ways to use them myself.

Here is some items I have recently made with them. Remember all the Snowmen themed, wooden spoons I have been making in the past? And the primitive, kitchen themed spoons? Well, there are now Gingerbread men spoons!


Since my little gingerbread men already have flat backs, all I really had to do was use some
E-6000 glue and stick them on. Super easy!

Here are a few more items I spruced up with the little cute, gingerbread men.

Here is the before pic of these stars, after I finished them in a crackle paint finish:

 Distressed Primitive Star with Crackle Finish

 
And most of the others were just a basic paint color.
I attached some cute homespun fabric to them, that I simply tied in a bow, with some E-6000 glue.
 And then just adorned the bow ends with the cute little gingerbread men!

The star to the left, I was practicing with some shadowing in paint colors. Not so sure I liked that!
 I'm still thinking up all kinds of ways to use them for the holidays. Really, the uses seem endless to me!
Hope you liked these ideas for little gingerbread men and see ya'll next time,
~Lisa

Sep 28, 2015

FAITH FAMILY FRIENDS WOOD CUTTING BOARD

This cool, Fall air has me in the mood for some winter crafts.  But right now I have a cute makeover to show ya!
Primitive Cutting Board Makeover

Here it is, a cute, well used, wooden cutting board. Or some say a dough board that I got from the local Good Will for only $.50.

Here it is before:

And here it is after:

Here's what I used to do the makeover with.

I keep a can of black paint on hand that is oil based and available at Walmart and painted an all over base coat. It's found in the outdoor section of the paint.

I got out one of my stencils from eBay with the wordings that I thought fit good.
Then I used some stencil paint made by DELTA in the Heritage color theme for the lettering.
I used the yellowish EGGNOG color.
This is an oil based, stencil paint, so remember it takes a little bit to dry.
And it is best to apply it with a makeup sponge if you ask me. I just can't do good with those stencil brushes.

Here it is side by side:

And that was a quick and easy makeover from a cheap, good bones find!
I bought the board for a whopping 50cents and priced it for $6.99.
SOLD Thank You!

Happy Crafting till next time Ya'll,
~Lisa