Pages - Menu

Showing posts with label Ball Jars. Show all posts

Dec 24, 2019

Mason Jar Earrings and Dollhouse Mini Mason Jars

Mason Jar Earrings 

and

Mini Wooden Dollhouse Mason Jars


Hey ya’ll!
I usually don’t do these type of posts, but here are some miniature, dollhouse mason jars I’ve recently been tinkering with.
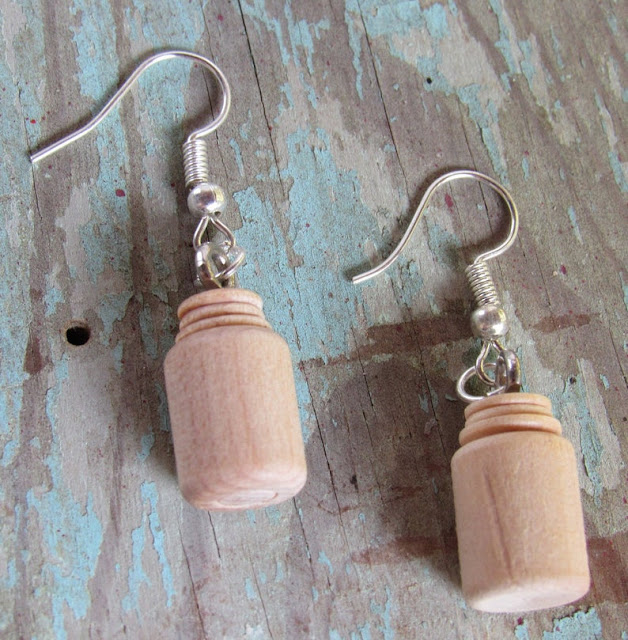
I have also made them into cute Mini Mason Jar Earrings too in my Etsy shop!

When I ran across a listing on ebay for these plain, unfinished, adorable little wooden mason jars, 
I knew I wanted them.  
I just didn’t know what for at that moment.

Well, today, about a year later, I got them out and thought it’d be cute to make some tiny little dollhouse type food for the cupboards. 
And then also made a few Mini Mason Jar earrings too.

I know that dollhouse miniatures are a very popular thing, I just haven’t really ever gotten into them.  
But give me tiny mason jars and I’m there!

So here was my idea.
I just went into Word and Paint on my pc and tinkered around and made some tiny little word labels.


I couldn’t get them to print out small enough, so I eventually had to copy them on my printer/scanner/fax and then resize them.  
I think I tried a 75% first and then eventually had to go down to a 49% to get a good fit.

 I gathered up some supplies:
-Mod Podge
-Scissors
-A Paintbrush


And then I just cut each one out. They were tiny! And I use some Mod Podge to glue them on and an extra coat to seal the outside.

 
And then just let them sit and dry. And wa~la!
Here they are.
 
If you look pretty dang close, you can see I tried to make some green beans, carrots and tomatoes in the right hand corner.  

To kind of give them a different look to make a set of 4. 
The fourth one, I just left plain to say Ball.
I am not sure my usual, craft peeps will be interested in these, but hey, maybe take this label idea and use it on larger items?

I  listed these in my Etsy as earrings.  
And here is a few pics of that:
 Now available in my Etsy shop


Happy Crafting ya’ll!
See ya next time,
~Lisa

Jul 25, 2019

Hand Stained Mason Jars in Various Colors

Assorted Half Pint Mason Jars stained by Booth555.com

Hey ya'll!
I have been in a kinda craft slump lately. It's just been so dang hot here in Kentucky. 
Even hitting "real feel" heat conditions of 105* out. 
So when I do run out it's mainly to just get where I'm going and such. Not much crafting, cutting, sorting or painting outdoors lately.

I am still staining new and old mason jars in all sorts of colors. 
Have been going on about 8 years or so now. 
And using the baking process to cure them. So thought I'd share a few pics of that for today.
Squatty half pint mason jars stained various colors by Booth555.com

So thought I'd share a few pics of that for today since I haven't shared much anything in a while.

This is the color AQUA that is the main seller. A certain view of the camera gives this belly shape look I love to these half pint, squatty style, mason Ball jars.

Half pint Squatty jar in Aqua by Booth555.com

Here they are upside down, drying, getting ready to be baked in the oven.
Aqua mason jars ready to be placed in the oven
In the oven is where they acquire their deep aqua color. Although in the pic below they don't appear to be much to look at yet.

Here is a close up of an aqua jar that has runs after the firing process.
Half pint Squatty jar in Aqua by Booth555.com

Look closely and you can see the imperfections.
I usually just end up keeping these for myself. So I don't mind the runs every now and then. lol.
The heat during firing  makes the excess stain I use run. So I can always see where I have used too much. It's hard to hold back when applying though. I love the deep colors a thick layer makes.


Before I bore you too much with my favorite jar colors I like to create, let me show you what I call antifreeze green. I just adore this color!
Half pint Squatty jar in Antifreeze Green by Booth555.com
When the light hits them a certain way, they really pop!
Half pint Squatty jar in Antifreeze Green by Booth555.com
And another favorite of mine is the soft, rosey pink.
Half pint Squatty jar in a Soft, rosey pink by Booth555.com


Half pint Squatty jar in a Soft, rosey pink by Booth555.com

Half pint Squatty jar in a Soft, rosey pink by Booth555.com

I have tons of more colors I use but don't want to bore you with each. I've also experimented doing two and three tones on some jars getting a fade effect. I didn't love those so much. But I do enjoy the colors above.
Whether you stick them on a shelf for display, use them as business card holders, battery operated candle holders or just junk jars, they add a little bit of color here or there.

Hope ya'll enjoyed seeing a few of the jars that's been keeping me busy lately.
See ya'll next time!
-Lisa

Assorted Half Pint Mason Jars stained by Booth555.com

Aug 31, 2015

WOODEN MASON JARS


Hey ya'll!

When I ran across these plain, unfinished, adorable little wooden mason jars, I knew I wanted them.  I just didn't know what for.


Well, today, about a year later, I got them out and thought it'd be cute to make some tiny little dollhouse type food for the cupboards.  I know that dollhouse miniatures are a very popular thing, I just haven't really ever gotten into them.  
But give me tiny mason jars and I'm there!

So here was my idea.
I just went into Word and Paint on my pc and tinkered around and made some tiny little word labels.


I couldn't get them to print out small enough, so I eventually had to copy them on my printer/scanner/fax and then resize them.  I think I tried a 75% first and then eventually had to go down to a 49% to get a good fit.

 I gathered up some supplies:
-Mod Podge
-Scissors
-A Paintbrush


And then I just cut each one out. They were tiny! And I use some Mod Podge to glue them on and an extra coat to seal the outside.

And then just let them sit and dry. And wa~la!
Here they are.

If you look pretty dang close, you can see I tried to make some green beans, carrots and tomatoes in the right hand corner.  To kind of give them a different look to make a set of 4. The fourth one, I just left plain to say Ball.

I am not sure my usual, craft peeps will be interested in these little doll house miniatures, but hey, maybe take this idea and use it on items?

I haven't really tinkered with anything like this before.  But with little jars, I'll do something with them or burst!

Happy Crafting ya'll!
See ya next time,
~Lisa

Aug 21, 2015

Mason Jar Soap Dispeners


I made some of these Mason Jar Soap Dispensers a few years ago, but in a different style, for my craft booth.
These I made in 2013 with cute homespun and wooden stars & rusty bells.

 And still today, they are great sellers.
I guess mainly because of the cool, Mason jars. They are just so country and cute, everyone seems to love them. I know I sure do.

Here is the basics of how I made these and what you may need.
-Ball Jars
-Soap Pump Dispenser 
(I bought the pre-made plastic ones with hand soap already in them, just toss the plastic container.) 
-Screwdriver and Hammer
-E-6000 Glue

This is the $1.00 Silk brand soap bottle I bought so I could get the foaming pump for one of them.
In the pic below, I'd already punched a whole and put the pump in the mason lid though.
Here is where I needed a screwdriver to start the hole.
I made sure to lay it outside right on top of a crack between the boards,
so that when it went through, it would hit the crack.
 A drill would have worked, but I didn't have one handy and my husband was at work.
But the screwdriver, hammer and pliers did the job.
 After the first couple punches.
 And then I started using the pliers to pinch it away and make the hole bigger.
 It really only took about 4 or 5 minutes. The lid metal peals back pretty easily.
And then after I got the hole the right size, (remember, this one above is for a foaming pump which is a lot bigger than the regular ones,) I needed to glue it in place.
 Place the glue on the plastic and let it get all over the metal lid too.
I needed to use a very strong holding glue, so I went with the E-6000 from Walmart. The only
thing with that glue is that it needs to sit and cure for around 24 hours. So glue it and get on to other crafts for a bit.

And here it is from the front.
OH, POINT OF INTEREST!
Notice my lids and rims are almost black. That is because I bought some Rustoleum spray paint and previously sprayed them a Rubbed Bronze color.

I just didn't like the shiny gold, regular rims for these jars.
 They are a deeper, metallic, rubbed color in person. Way prettier than this pic looks.

Then just fill up the jar, after letting that dry for 24 hours,
 and stick the metal ring on to hold it in place.
And you are done.
 And here that one is:

I finished it off with jut twine and a grungy tag I previously made.

And then for the red one, I used one of those pre-made lids especially made for Ball jars.
Here is how it looks.
Here is the lid out of the pack. I got it at a Burkes Outlet store for a little over $2.00, but it wouldn't be cost worthy to buy lots of these for that price. So I will stick to making my own like above.
I just had to pick a cute color for the soap, my kitchen is red, so  I found some $1.00 Apple Crisp shampoo and used that.

Just fill and stick it together.
 And that is all for that one!


Notice this soap looks watery. It's because it is the foam dispenser pump.
A very cute Mason Jar craft to do!
I am keeping one of the red ones for my kitchen!

See ya'll next time!
~Lisa