Pages - Menu

Sep 14, 2015

Mason Jar Lid Pumpkin Magnets


MASON JAR LID PUMPKIN MAGNETS


 I am still gearing up for the holidays just around the bin.  And my craft booth really needs some more goodies to get shoppers in the mood.  So here are some Halloween themed refrigerator magnets that I made using some old, leftover mason jar lids.

(Click here to see the pumpkin and wreath made from the mason jar rings.)
 

Making the Mason Jar lid pumpkin magnets is a pretty simple craft but really kinda fun.

You need just the basics of crafts including:
- Mason Jar Lids (regular size and large mouth is what I used)
-Craft Paint: Black and Orange Cinnamon
-E-6000 Glue
-Round Magnets 


Just take your plain, shiny lids and give them a base coat of black

And then do a second of a orange color. I chose Cinnamon in the Apple Barrel line.
I just used a makeup sponge and kinda dob it on to give it a more worn look like so.
See how the top one looks way cuter? I love it way better than the plain orange one I tried on the bottom. On it, I just went back and dobbed on some black paint with a sponge to make it more cuter too.


Then I started painting on some pumpkin faces. Just some basic ones at first.

And then I got a little different now and then and added a "Boo" and a "Scarecrow" face.


And then it was time to glue on the magnets to the back with the E-6000 glue.

These are the 3/4" Button Magnets from Walmart that cost about $3.00 for a pack of 52.
These two together make a super strong hold!


Let the glue dry for about five or six hours because it is super strong once it gets a good drying.
And it will hold quite a few pieces of paper to your refrigerator too.


And then there you have them, they are all ready to go.


I think I am going to package these up and price them for maybe 2 for $1.00?
Do you think that price is fair enough?
 I know they will look way cuter when they get in the packaging and I try to price stuff so that I won't loose money on the packaging materials either.

*
I forgot to mention one thing. I am also going back and adding a touch of straw here and there and homespun in the corners. I will update soon with those pics. I was just in a bit of a hurry to share these and got ahead of myself. lol
*


 Hope you liked these little Pumpkin magnets made out of ole' Mason jar lids.
See ya'll next time,
~Lisa 

Sep 12, 2015

MASON JAR LID WREATH DIY Craft Tutorial

MASON JAR LID WREATH

Want a cute way to use up all of those extra Mason Jar lid rings you got laying around? I recently saw a  few posts on Pinterest about these and I couldn't wait to give it a try.
I have quite a few...
  And this is how I did it.

Super easy.  Seriously.  Just take some sort of heavy wire,  or in my case, I used a wire clothes hanger.  I used wire cutters and clipped one end open so I can string the rings on them.
 
Then I just bent it to the shape I needed and started sliding them on.
 
 
The number of lids basically depend on how big you want your wreath to be.  Oh, and these ones I was using are Regular mouth, standard lids. So just play with it.  But I'd recommend at least having 30 to 50 rings on hand. More for a larger one or so on. 
 
You could also experiment with "fillers" in between each ring to save on using so many. But for my first one here, I'm just gonna keep it as simple as I can.

And seriously, that is it.  After you have strung enough, just twist up your wire together and if you can, leave the hook for easy hanging. Otherwise you can tie on some sort of fabric hanger if you have to.

You probably will have to go back, once it is hanging and straighten out the rings. They tend to move and shift while working with the wire a lot.
See how they shift. But it's easy to straighten them up. And after it's done, they stay even with the door opening and closing.

Super easy and cheap craft that definitely screams country any where you place it.


I'm already thinking of making another one.
But for it, I am thinking of experimenting with those foam floater sticks for swimming. I bet they would hold good, as long as they will fit inside the rings. And I bet with those, I'll definitely have to use some sort of filler to hide the foam rings. 

See ya'll next time,
~Lisa

MORE PRIMITIVE SNOWMEN CLOTHESPIN MAGNETS


SNOWMEN CLOTHESPIN MAGNETS

It's headed into that time of year again! I know it is still months ahead for most shoppers, but for us makers of the holiday crafts, we have to start early.

Here is a fresh new batch of my Snowmen Clothespin Magnets.

In case you missed the others:

I started off with these plain, wooden clothespins from the Dollar Tree for $1.00.

First, I spray painted some of them them all Almond in the Rustoleum brand from Walmart, the rest a regular white.

 I found laying them on chicken wire really helped make the spraying go faster. More air could get in and out too to dry better. Waited for that to dry, flipped them over, sprayed the backs.

And then sometimes I just stick them on my clothesline and spray them there too.
 Then I just lay them all out in lines and I start to do about three of them in the same facial designs at once.
That way I don't get too bored repeating the same thing over and over. And it makes for a great way to make the batches a little bit different each time!

Then I start throwing in some random words like Faith, Family, Friends, Joy, Hope or such.
And then more and more. Just whatever really pops into my head at the time.
And when I get tired of the same ole' again, I started trying new faces kinda like some I saw on some spindles on Pinterest.
oh, have to add her a nose....
The main key to making so many of these Snowmen Clothespin Magnets, I think, is to do a few at a time in steps. Like say do three sets with the same eyes, then go on and do three different ones. Then come back and do three sets of noses or so on. And that way it doesn't really feel like tons of the same at once.
And then I had to start thinking about what to use as a scarf. I always keep leftover material on hand. So I have plenty. I like to cut a start of a line, then tear it the rest of the way off to give it a more worn, primitive look.
Just tie it on and it instantly dresses them up quite a bit!


There's some above, in some blue scarves I changed up.

I love these colors the most though. Just that they remind me of Christmas more or something!
And here's some more pics so you can get some ideas of more faces if you need them.
And some Faith, Family and Friends styles again.


And then just use some E-6000 glue and glue on some magnets. I buy the stronger, button round ones from Walmart in the packs of 52 for around $3.00. It's best to never try to use the strips with stick and go for these. Those aren't quite strong enough for anything.


If they don't have the small enough round ones, you can still get the 3/4" and cut them in half with strong scissors and you get double for your money. And they look fine!


And now, if you are still with me after the tons of photos! (sorry I just can't get enough snowmen!)
I was ready to package these up for sale in packs of 10 this year. Because that is how I am selling them in my online store.

So I just grabbed the closest size, clear bag I had, (which was a little too big, but I can make due.)
And some crafting paper in a pretty brown.
And my reindeer scissors which really get me in the mood! lol

Just cut the crafting paper about as tall as the Snowmen Clothespin Magnets and as wide as your bag is. Insert it as the backdrop and then just line up your magnets.  I've learned magnets are usually hard to package because they will tend to flip and stick to each other.  But if you put them in close enough and tight enough to each other, they stand very good and firm for packaging!


I try to keep them in color coordinated packs because on ebay people tend to want them all in one color theme. Or they usually buy two sets, one of each color.

And then I take one of my printed out cards, 
that I made from using AVERY online, print them on cardstock, and sometimes stick them in the end to take up space. Just bend over the sides and it will stand. 

Or sometimes I just roll the sides of the bag back and tape it and stick my bag toppers, that I also make with Avery online, and staple them to the top.

And here's the back of the topper I made in Avery online:


And sorry again about the tons of pics, but I just love them all!

Here's some all packaged up now and ready to go!


They are all packaged up, just waiting for some new Winter Homes!
;-)

Hope ya'll liked these batches of my new Snowmen Clothespin Magnets!
I sure had fun making them. And I will probably make a few more batches if I have time tomorrow.

Happy crafting until I see ya'll next time,
~Lisa

Sep 11, 2015

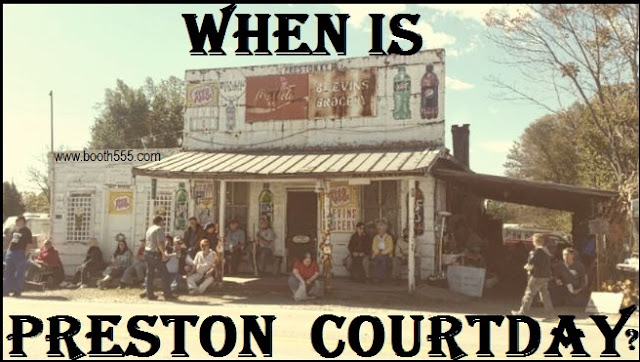
WHEN IS PRESTON COURT DAYS ?

When Is Preston Court Day in KY?

COURT DAY Dates

The Preston Court Days are set to run for a total of four (official) days and always ends on the third Monday in October.  
Unofficially, however, it expands a full seven days if you count when the locals begin to set up early.

WHAT IS PRESTON COURT DAY?
Court Days in Preston, KY, is an outdoor festival known to locals as Trade Days.

Every year the attractions grow and expand drastically.
The main focus of of the Preston Court Days are the dog and various animal trades, gun swapping/buying, and yard sales. Especially since the neighboring Mt.Sterling Trade Days banned 
 the sale or trade of animals around 1970.
But there are also numerous flea market type booths, craft booths, food booths and even some smaller carnival rides staggered all throughout Preston,


IMPORTANT NOTE:

The last day of the event is ALWAYS the third Monday of October. 

So this will help you determine which day it begins each year.


Where is Preston, KY?
Preston is one of the towns that make up the county known as Bath. It is only about three miles south west of Owingsville, right off I-64 interstate, exit 121. It was founded in 1881 as Preston Station as being part of the Big Sandy Railroad. 

Directions to Preston, KY please click here: Preston Map


I recommend the Blooming Onions! 
The original ones, not the cheaper versions out there. 


But my sister swears the Amish home made fried apple pies are to die for!


And the chili dogs along with an ice cold Ale-8.


And my husband loves the Philly Cheese Steak with all the peppers and such:


If you need driving directions to Preston, KY 
please click here: Preston Map


---------------------
*VENDORS:*
For vendor information, you may try this FB link.
Note: Sorry, I am no help otherwise for booth rentals.
----------------------


Bit o' History
Preston Court Days originally stemmed off from the Mt. Sterling Court Days in the 1970's with the help from James "Coon" Conyers.

Way back in 1794, the Mt. Sterling Court days got it's name because once a year the Circuit Judge made a visit to town to try criminals.  And people from the area  would meet up  to sell their items and crops or to do some trading of goods. Back then Mt. Sterling allowed the sale and trade of dogs and many other animals.  But dogs were always the main attraction.  Hunters from all over came to buy, sell and trade for dogs. Hence the nickname of the event, Trade Days. 

Then sometime in the 1970's, the Mt. Sterling Court Days banned the sale of animals, especially dogs. I'm not sure why but many people were outraged, including James "Coon" Conyers.  He had been running the largest dog trade days in KY, so he decided that he would start one up in Preston. 
  
And wow did it take off!

Nowadays, coon hunters, shoppers, sightseers, antique hunters and everyday locals can't wait for this yearly event to roll in!
The tiny town of Preston is made up of only about 500 people.  But when Court Days roll in, the visitor count will easily exceed ten to fifteen thousand.  And each year that number continues to grow!


See ya'll there either buying, selling or trading.


Leave a comment and let us all know what your 
favorite Court Day Food is!

Read more here: http://www.kentucky.com/2008/10/18/559612_court-days-rolls-around-in-preston.html?rh=1#storylink=cpy