Pages - Menu

Showing posts with label snowmen. Show all posts

Dec 3, 2019

Snowmen Light bulb Ornaments


I don't think I've previously written about these adorable snowmen Ornaments.
If I have sorry, but they are just so dang cute they need to be posted again! lol

I have taken both new and vintage Christmas tree glass bulbs and painted them up as snowmen.
Their sizes are approximately:
Height: 3 Inches; Width: 1.5 Inches; Depth: 1 Inches

I have hand painted each Christmas bulbs with various Snowmen faces and expressions and then attached craft wire for easy hanging.


These are best displayed as a set. So I tend to make a lot of them to sale.
A tree full of these would look awesome.


I do hand paint new ones each week, so no two are ever exactly alike. And that is a bonus
to making hand made gifts. Each and every one is unique.


Great to decorate with or to give as gifts separately. 
And adorable as cute tie on gifts to top wrapped gifts with.


If you have any old bulbs on a strand that don't burn anymore give this a try.
You can also buy brand new bulbs, this size in packages of 5 at Walmart and Lowes.


Happy Crafting!

Sep 13, 2017

MASON JAR SNOWMEN KEY CHAINS


I absolutely love any type of mason jar crafts and snowmen.  
And when a time comes to join mason jars and snowmen together, I give it a try.  
So here's the latest idea I've had.

MASON JAR SNOWMEN KEY CHAINS

I have a ton of these wooden mason jars made up because I make them into key chains. Kinda as my business cards, to give out with purchases of my stained mason jars

But this morning I had the idea to make some into snowmen key chains.

You could also do this with the flat, wooden, mason jar gift tags found at Walmart.
Set of 12 for $2.23
Photo from Walmart.com
In this photo, I'd already drilled a hole and screwed my eye hooks down into the top.
The plain eye hooks come in a pack of 20 for .59 cents at our local Ollies.

And now for the first step to painting the snowmen faces.
I used these colors for snowmen:

When it comes to painting snowmen faces, don't over think it.  Just do each eye, nose, mouth all at once and it will come together. 
Now, just take some orange paint and stick on a pointy nose.

Now, take the end of the brush, the pointy tip and dot on some eyes.

Now add some mouths with the same end of the brush.

See, step by step they are beginning to look like snowmen and it isn't as hard as you think.


And little lines for eyebrows.


And now time to add some rosey cheeks and a bit of mixed orange and white to add snow to the nose.


And now it's time to attach the ring holder. I always save old keychains for this.  This time I had a bunch of dolphins that I had saved back from a sale I caught at our Preston Court Days.
I got an entire bag of 50 +/- for $2.00 !!

I used pliers to pry off the ring.


And then just stick it right back on my Mason Jar Snowmen Key Chains.


I think they are really turning out cute.
What about you?


Oh, and if you're wondering how big these are, I forgot to say.

Just the right size for a key chain and I also have a little bit smaller size on hand too.


And to seal them, I hung them up outside, by the hangers with clothespins and gave them a quick spray of clear coat.

And that's it. Now we have Mason Jar Snowmen Key Chains. 
A combination of the two things I love to craft with!
And remember, you can get those flat, wooden mason jar tags from Walmart to do about the same craft!
Set of 12 for $2.23
Photo from Walmart.com
Hope ya' liked this idea.

See ya'll next time,
~Lisa

Sep 6, 2016

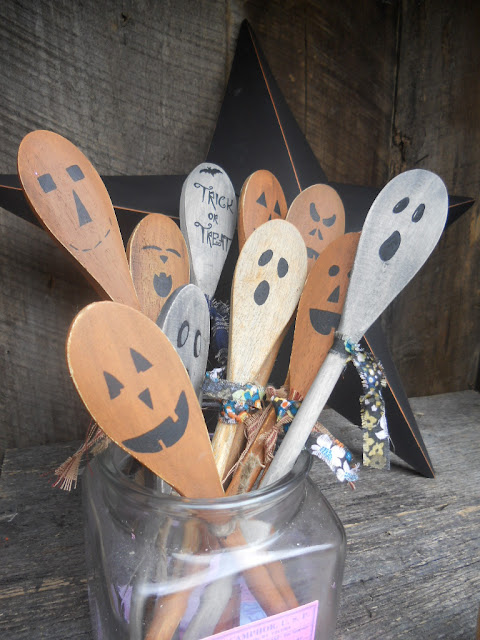
HALLOWEEN MASON JARS with Wooden Pumpkin Spoons


Hey ya'll!
Here's a Halloween themed idea for those plain ole' Mason jars you may have.  And if you don't have any on hand, Walmart and even the Dollar General stores carry them in cases.
Plain jar before
The Halloween themed Mason jar looks like it has a lot going on. Really it was pretty simple.

Okay, so first off we need to clean the outside of the jar with a little bit of alcohol.  This will remove all dust, lint and crap so it will have a good, sharp finish.
I just wiped it down with a paper towel dipped in the alcohol.

Okay then just paint the inside of the jar a color you want to pop. I choose the Cinnamon color from Folk Art craft paints.  

Oops, this is a pic of another one I painted Cinnamon on the outside. But anyways, just paint the orange on the inside if you are going for the look of my top pic, or vice versa if for another. 

And for the outside I went with antique white.

Okay, I've switched up the pics somehow of the inside and outside, but this pic shows the white inside. But remember you want the white on the outside if you want it like the jar at the top of this page.
For some reason I've vice-versa'd the pics.

Okay, anyways, after you have painted a good coat on the outside in white, and its dry, take some fine grit sandpaper and sand it. 

And you'll start seeing this.

I like all the scratchy type marks.
And wipe all the dust off then add one coat of sealer. I like the varnish in satin.


And let it dry then decorate it with burlap strips, a bell

                        
      and some of my pre-made  


And here it is finished:


And here's the other one I just finished up.


See ya'll next time,
~Lisa


You may also like:

More Mason Jars in the Halloween Theme

 LINK TO HALLOWEEN WOODEN SPOONS