Pages - Menu

Showing posts with label wooden spoons. Show all posts

Sep 6, 2016

HALLOWEEN MASON JARS with Wooden Pumpkin Spoons


Hey ya'll!
Here's a Halloween themed idea for those plain ole' Mason jars you may have.  And if you don't have any on hand, Walmart and even the Dollar General stores carry them in cases.
Plain jar before
The Halloween themed Mason jar looks like it has a lot going on. Really it was pretty simple.

Okay, so first off we need to clean the outside of the jar with a little bit of alcohol.  This will remove all dust, lint and crap so it will have a good, sharp finish.
I just wiped it down with a paper towel dipped in the alcohol.

Okay then just paint the inside of the jar a color you want to pop. I choose the Cinnamon color from Folk Art craft paints.  

Oops, this is a pic of another one I painted Cinnamon on the outside. But anyways, just paint the orange on the inside if you are going for the look of my top pic, or vice versa if for another. 

And for the outside I went with antique white.

Okay, I've switched up the pics somehow of the inside and outside, but this pic shows the white inside. But remember you want the white on the outside if you want it like the jar at the top of this page.
For some reason I've vice-versa'd the pics.

Okay, anyways, after you have painted a good coat on the outside in white, and its dry, take some fine grit sandpaper and sand it. 

And you'll start seeing this.

I like all the scratchy type marks.
And wipe all the dust off then add one coat of sealer. I like the varnish in satin.


And let it dry then decorate it with burlap strips, a bell

                        
      and some of my pre-made  


And here it is finished:


And here's the other one I just finished up.


See ya'll next time,
~Lisa


You may also like:

More Mason Jars in the Halloween Theme

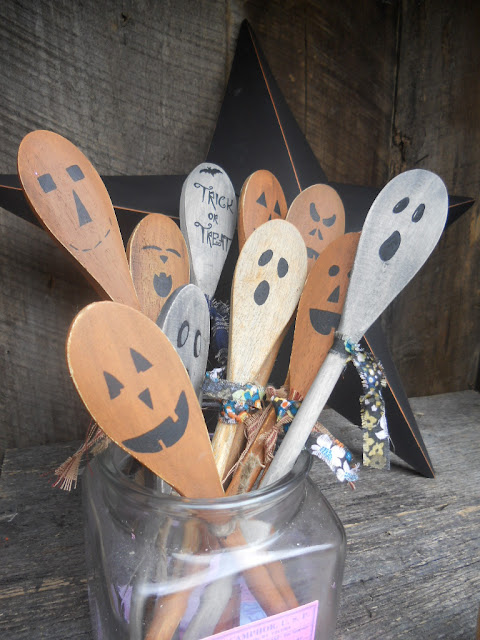
 LINK TO HALLOWEEN WOODEN SPOONS

Aug 16, 2015

COUNTRY HOME IDEAS

COUNTRY MAKES MY HOUSE A HOME

 (Taking a break from crafting posts today to share some pics.)

I have been re-arranging and already getting my house ready for fall.
Enough summer heat and bugs for me already. 

So while digging out my found treasures from auctions and flea markets, I thought I'd share a few pics of stuff that I love to collect.

All these items are what makes my house a Country Home.


Yes, I love canning jars.  
I am in the process of putting these in a cabinet. Photos later.

And no, not just the blue ones either.

But the aqua blue ones really are my absolute favorite.
 (Sorry about the darker pics, this Samsung Tablet doesn't have a flash)

But there is just something about having  a bunch of the clear ones sitting around that makes me feel at home. That good ole' country home feeling.

And since I can stain them, like I shared in a previous post, HOW TO STAIN MASON JARS, I love having plenty on hand to work with.

And then we have the wooden spoons and rolling pins that I absolutely love.
Here are a few shots from around my dinning room and kitchen.
Oh, and the crocks. I love them, but doesn't everyone?
And old pitchers for the patterns and because they can hold wooden spoons lol.
Even the old cracked and broken ones can find a place in my home.
What I love about country living and decorating is that there are no rules.
If I like it, I use it. If it fits, it stays there.

Oh, and I love the red and white enamelware! I am really just starting to collect the plates and such too.
Hum, I'm beginning to wander if I have enough pitchers full of wooden spoons? Now that I am snapping pics, I am realizing I have quite a few. Na, not enough yet!

 Here's an old coffee pot I also love.


And here's some more random shots. I just really cannot get enough wooden spoons tucked here and there!


And rolling pins. What country home doesn't have a few rolling pins here or there?

And here are some tiny, wooden rolling pins my aunt Marlene gave me:

Ain't they just cute? 


And I think that is pretty much enough indoor stuff for now.
I don't want to overload you with my love of the country decorating.

So before I go, here's one last thing. It's my favorite outside garden thing.


This use to be the entrance to my strawberry garden.

Sadly they didn't grow great here, so I moved as many as I could that were left.


When taking down the fenced in area, (lots of lattice) I had my husband to leave the entrance like so, with the gate.

And I love it.
Right now it has tons of morning glories trailing up it.


And one more last thing, lol.
Here's my country, barn wood fences out front.


And here is the backs. I've put some rose bushes behind them now so I can see them from my front porch.


Here is a link to how I made these barn wood fences, if you are interested.

Hope ya'll liked these pics of my country decorating ideas.
See ya'll next time!
~Lisa

Aug 26, 2014

Primitive Wooden Spoon Magnets

I recently posted about how to make primitive, wooden spoons here: PRIMITIVE WOODEN SPOONS with step by step detail. It was a great project! And got lots of interest from many of you.

I have since revisited this idea and turned the crafting up just a notch by making them more interesting.

Here's how I did it:

I started off with plain, simple wood spoons found at Walmart in packs of 4 for around a dollar in the kitchen supply section.

I use a few of the same photos from previous posts when it is plain wood spoons so I don't have to take them for each craft post. lol. Just in case you are tired of seeing this same pic I use in my spoon posts.

Very cheap!

I bout about 10 packs of these. And then I paint them in a variety of colors. Here's a group of mine being painted in ivory white. I used spray paint this time because it was faster.


Just mix and match sizes and paint them in groups. Let dry for a few hours. Don't forget to paint the backs!

Sometimes though, for certain colors, you will need to hand paint on some craft paint for the base coats. This takes more time, but you have many great colors to choose from. I tend to stick to basic black, navy blue, wine red, okra yellow and sage green as base colors.


And then after you have a ton of all these colors ready, you're set for the next step.

You will need to paint over them with a second coat in another totally different color. Yes, I know sounds like a lot of work, but trust me, IT IS WORTH IT. It makes them look so much better.

And after that second coat, you will be ready to start some light to medium sanding. I use a light sand paper, nothing real heavy.
LOOK CLOSE at the REDish color one in the middle. Do you see how the black is the second coat? See when I took sandpaper and brushed off some of the second coat, it allowed the red underneath to show. And it makes it look older. I love it!

When I ran out of black spray paint, I brushed on some of that in the can too. I was worried it wouldn't sand off easy, but it did.


And after the sanding, I was ready to start hand painting some detail. I just looked around in magazines and online clipart for ideas in the primitive them and free handed them below.
Some I did a willow tree on, and old crow that I tried to paint, sitting on a crock. A simple bowl with a star and a window scene with shutters. And oh, a cute plate sitting on a shelf with a star in it. These took some time, about an hour to just do this part and lots of patience.

And then I was ready to add the magnet. I got the round ones from Walmart craft section cause they are stronger to hold notes and papers.

Just simply hot glue them on. The hold is super strong! And it dries fast!

And here's some that I have all finished and in my Peddlers Mall Booth #555:
I priced these for $2.49 each. I'm not sure if that is good or bad because I have none to compare them to. So far, I'm the only one that has made them in my area for sale. With such a strong magnet, I think it is worth it.

What do you think?


--------------------------------------------

Note: In case you don't want to do magnets on these: For the previous Primitive Style Wooden Spoons that I made and didn't turn into magnets, I grouped them in groups of 3 for sale, like this: