Pages - Menu

Showing posts with label snowman magnets. Show all posts

Oct 5, 2016

DIY PRIMITIVE SNOWMAN LID MAGNETS


This post is an expansion of a craft I did a few weeks ago.
You may recall the 
 Click to view how I made these

 Click to view these

Well, this is basically the same only that I made more into magnets instead of hanging ornaments.


 Here's how I made them in case you want to give it a go. 
If you don't have any on hand, here's how they look in boxes at Walmart.
started out with a bunch of plain ole, used, metal Mason Jar lids in two sizes of
Regular: 2 2/4"
Wide Mouth: 3 3/4"
Some were new and shiny, some old and rusty. It doesn't matter to me.
And I spray painted them a base color in various shades of green and maroon that I had on hand.
The white was used for speckling (snow) only because it's a cheaper can and doesn't cover good.
Here are the Rustoleum and Valspar that cover great in one coat:


After they dry, they are a flat, softer color. Then we're ready to get started painting with craft paint.
My favorite brand is Folk Art but I do have a lot of Apple Barrel on hand too.

Just start by making various circles for the basic face shape of the snowman. 
I use Antique White as the color.

Sometimes I dab my brush, sometimes swirl.
Then just on to the dots for the eyes, and carrots for the noses.
When you think of them all as dots and such, it's easier for me to paint, rather than thinking, "oh I have to paint a face." Dots and carrots come easier. ;-)


And after they were all painted and dried, I simply went glued on some round magnets using E-6000 glue.


I always recommend the E-6000 glue over anything, especially hot glue because you want a good strong hold for magnets.  And with taking them on and off refrigerators and such, the E-6000 glue really holds up.

As for the magnets, you can get the good round ones at Walmart in the crafts section.
For the larger lids, I used the larger magnets and for the smaller lids, I used the smaller magnets.

And that is about all there was to it, besides adding a few decorations to the front.
I love homespun fabric on about anything. And to a few, I added a bell here and there.

And here they are all ready to go in my craft booth for the Christmas Open House.


I save my metal cans that food comes in such as green beans and baked beans to use as display tins.

I like having a variety of sizes to catch the eye.


I am pricing these for $1.99 each in my craft booth, un-packaged, with just a sticky price on the back.
I hope they will make for a quick, grab and give gift item!


What do you think? Would you give these as a lil' inexpensive Christmas gift?

See ya'll next time,
~Lisa

Sep 6, 2016

HALLOWEEN MASON JARS with Wooden Pumpkin Spoons


Hey ya'll!
Here's a Halloween themed idea for those plain ole' Mason jars you may have.  And if you don't have any on hand, Walmart and even the Dollar General stores carry them in cases.
Plain jar before
The Halloween themed Mason jar looks like it has a lot going on. Really it was pretty simple.

Okay, so first off we need to clean the outside of the jar with a little bit of alcohol.  This will remove all dust, lint and crap so it will have a good, sharp finish.
I just wiped it down with a paper towel dipped in the alcohol.

Okay then just paint the inside of the jar a color you want to pop. I choose the Cinnamon color from Folk Art craft paints.  

Oops, this is a pic of another one I painted Cinnamon on the outside. But anyways, just paint the orange on the inside if you are going for the look of my top pic, or vice versa if for another. 

And for the outside I went with antique white.

Okay, I've switched up the pics somehow of the inside and outside, but this pic shows the white inside. But remember you want the white on the outside if you want it like the jar at the top of this page.
For some reason I've vice-versa'd the pics.

Okay, anyways, after you have painted a good coat on the outside in white, and its dry, take some fine grit sandpaper and sand it. 

And you'll start seeing this.

I like all the scratchy type marks.
And wipe all the dust off then add one coat of sealer. I like the varnish in satin.


And let it dry then decorate it with burlap strips, a bell

                        
      and some of my pre-made  


And here it is finished:


And here's the other one I just finished up.


See ya'll next time,
~Lisa


You may also like:

More Mason Jars in the Halloween Theme

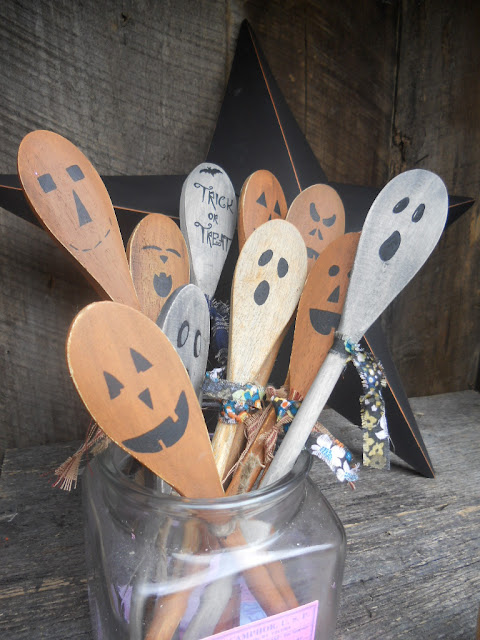
 LINK TO HALLOWEEN WOODEN SPOONS

Nov 19, 2014

Snowman Spoon Magnets


The Peddlers Mall has kept me pretty busy lately with the holidays coming up so fast.  My hand made crafts are already selling out! I couldn't be more happier!  Just knowing that people really like the little things I make is an awesome feeling!

Here is the latest little snowman crafts I have made.  Snowman wooden spoon magnets. I priced these little primitive cuties for only .99 cents each so that it will be a cheap gift for anyone to pickup.


These started out as little wooden spoons that I had won off from an eBay auction.  I got a pack of like 48 or so for $7.00, since it was an open package. Great deal! Still plenty enough for me to use.


They are approximately 3 5/8" tall so they will make for some cute little snowman magnets! Not sure where these were bought from originally but I'd guess WalMart has some similiar.

First, I laid them all out on some wax paper so that my counters will stay somewhat clean.  Then I gave them a quick coat of off white craft paint.  (If it had been warmer outside, I would have simply spray painted them but it was like 20* outside!)
Just dab on a glob of orange and pull your paintbrush straight down. That's it for the noses! Simple.
And above you can see that I used some dark orange to paint on little skinny noses. These are popular on the primitive themed snowmen.

And next I free handed on some little cute faces.
Just use your imagination when painting on the faces. Give each a different look by simply doing the eyebrows differently or the mouths.
I like the little X's for mouths for some reason, lol.

Next, I tied on little bits of pieces of homespun fabric in all different colors to make these little snowmen a scarf.  I had bunches of these leftover from various other crafts and I always save the little scraps for things like this.

And then it was time to add the little magnet on the back.  I got this package of 20 magnets at the local Dollar Mart for only $1.00 called Magnetic Buttons.  Sadly last month that store closed though.
20 magnetic buttons for only $1.00 from the Dollar Mart.
These are small but strong enough to hold up these little wooden spoon snowman magnets.

Here you can see instead of all having black buttons of coal down the body, I wrote a few words such as "love and friends."  It just adds a bit more cuteness I think and gives each it's own personality.
Look close and you can see the little strips of homespun fabric as scarfs.  I just tied a simple knot in them around the neck area.
As you see above, I stuck them in an old white enamel pan for display.  These pans make them look cute and are an easy magnetic board to stick them to for displaying.
I was going to add little jingle bells to the scarves but I couldn't find any in my craft supplies small enough.

So here you have it, my Snowman Wooden Spoon Magnets made out of plain wooden sticks, similar to ice cream spoons, for only $ .99 in my Peddlers Mall Booth #555.

You may also like my previous post:

SNOWMAN MAGNETS from FREE Paint Stir Sticks : Primitive Snowmen