Pages - Menu

Showing posts with label dollar store crafts. Show all posts

Sep 15, 2016

TARGET ORNAMENT GIFTS

TARGET ORNAMENTS
"Hit me with your best shot." 
-REALLY!


Hey ya'll, I've been busy making a ton of Christmas ornaments this week. And I had an idea since it is bow season (hunting) in our area, that I should make some sort of hunting ornaments that men and women hunters would like.  So this is what I came up with.


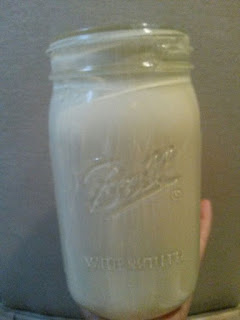
I used my metal, regular mouth sized, Mason jar lids, (not rings,) 


and spray painted them various colors.


Some even camo by spraying the base black and coming back in with spruce green here and there.

At the moment I painted the CAMO, I didn't realize they were WIDE MOUTH LIDS, so I couldn't use them with the 2" circle target cutouts. The Wide Mouth Lids need the 3" cutouts.


While those were drying,
I did a quick search and found this free image via Wikipedia to use as a center.


Then I just used Avery Print Online and uploaded the target pic into the 2" round printable project.

 Which was perfect since the regular size since these regular size jar lids are about 2 3/4", the 2 inch circle pic fits right in the center.


I used Elmers glue, lightly painting it on with a paintbrush, to the back of the cutout circles (using regular scissors,) and gluing them onto the lid.  If you get too much glue the paper will bubble.


And just stick them on in the center.


This is how it looks.


Give it a bit to dry, and then you will need to take a hole punch or a nail to puncture a hole at the top to attach a hanger.


Here's the closeup.
Just big enough to put a wire hanger through.


See the wire hanger to the right in the pic? Hard to see a bit. It's just those extra Christmas ornament hooks that come in packages of 50 or 100 at the Dollar General Stores. Perfect for this craft.

And I also wanted to package these so I took an extra step to print out bag toppers also at AVERY PRINT ONLINE.


 I added the tag line, "Hit me with your best shot."
I thought it was a cute idea.


I didn't take a pic of them in the bags, but here's is what it looks like all done.


I think since I'm bagging them up to make them a cute Christmas gift, I'm gonna price them for $1.99 each.  If I didn't bag them, so they'd be cheaper, I'd price them for just .99 cents each. And to have a place to display the un-packaged ones, I thought I needed something to hang them in. So I made this.


I used a box top off of  just an old cardboard box.


I had already started to paint it before thinking of a pic, but I got one.
Ihad just done one coat of black on the outside so far. Then on the inside, as you see, I left cardboard brown and took a real leaf and held it up and spray painted over it.  This gave it a camouflage look to go with my hunting theme.  I used Rustoleum in Spruce Green for this.

Then after that all was dry, I used some plastic hanger that I had from a display rack for the hanging racks.
I just punched a hole through the cardboard with a knife and stuck in the hangers.


I then just used duct tape for the back to secure them.

 It holds great but is ugly. No one is going to see the back anyways.


And here it is from the front. I had to adjust the duct tape on the back to straighten the pegs though.


Then I took more duct tape,


 to seam off the edges for a cuter, country look.


And here it is all done. Holding the un-packaged DIY Target Ornaments.


 I just printed out a sign that says TARGET ORNAMENTS .99 and glued it to a strip of duct tape for the top sign.


 And for the hanging price tags, I googled, "hit me with your best shot," and found this little black sign. I printed out a sheet of them onto red paper, punched a hole with a hole puncher and wrote the price on the back.


And that was that.
I'll be able to use this camo, country display for lots of items later too.


What do you think about these?
If ya' give them as a git, they can decorate their tree at first, then take them out and fire away!


See ya'll next time,
~Lisa

Sep 6, 2016

HALLOWEEN MASON JARS with Wooden Pumpkin Spoons


Hey ya'll!
Here's a Halloween themed idea for those plain ole' Mason jars you may have.  And if you don't have any on hand, Walmart and even the Dollar General stores carry them in cases.
Plain jar before
The Halloween themed Mason jar looks like it has a lot going on. Really it was pretty simple.

Okay, so first off we need to clean the outside of the jar with a little bit of alcohol.  This will remove all dust, lint and crap so it will have a good, sharp finish.
I just wiped it down with a paper towel dipped in the alcohol.

Okay then just paint the inside of the jar a color you want to pop. I choose the Cinnamon color from Folk Art craft paints.  

Oops, this is a pic of another one I painted Cinnamon on the outside. But anyways, just paint the orange on the inside if you are going for the look of my top pic, or vice versa if for another. 

And for the outside I went with antique white.

Okay, I've switched up the pics somehow of the inside and outside, but this pic shows the white inside. But remember you want the white on the outside if you want it like the jar at the top of this page.
For some reason I've vice-versa'd the pics.

Okay, anyways, after you have painted a good coat on the outside in white, and its dry, take some fine grit sandpaper and sand it. 

And you'll start seeing this.

I like all the scratchy type marks.
And wipe all the dust off then add one coat of sealer. I like the varnish in satin.


And let it dry then decorate it with burlap strips, a bell

                        
      and some of my pre-made  


And here it is finished:


And here's the other one I just finished up.


See ya'll next time,
~Lisa


You may also like:

More Mason Jars in the Halloween Theme

 LINK TO HALLOWEEN WOODEN SPOONS

Aug 20, 2015

HALLOWEEN CUPCAKE CANDLES with Free Linkup


Here's a little different spin I thought I'd try with some cute candles.
I call them Cupcake Candles.

I had some candy corn style candles left over from my craft booth sales, and I was trying to find a way to re-do them to sale again.  And then I thought about making something with the cute Halloween cupcake papers I had on hand.
And then I thought, hum, what about some Halloween Cupcake Candles?
They'd be cute tucked on a kitchen shelf maybe.

Here's what I did. I took the cute little candy corn votives, (if you don't have this style,  you can easily paint your own on the plain white ones with some yellow and orange paint,) Halloween cupcake wrappers and dried pumpkin pods. And later a rusty lid that I made.

And glued them to the cupcake papers.  Just to hold them in place good. I used E-6000 glue from Walmart.

And then to dress them up, I tossed in the top, around the candle, some pumpkin putka pods.  

The pumpkin putka pds are used in primitive decorating for bowl fillers and crafts. I found mine on ebay from a wonderful lady's store called simple*gatherings. You get 4 cups for only $5.74. So it really goes a long way.
And then I took a bit of grapevine garland and made a circle big enough to hold it all.
I think I may sit this on a dark little saucer of some sort also on my shelf.

And then I thought I could do a little bit more and put these in some grungy, rusty jar lids I've previously made. (Later this week, I'm posting on how to grung up the entire Mason jars also.)
And here they are in the lids:
I added some more dried pumpkin pods,
And to kind of finish it off, I took (ripped) a sprig of one of my pip berry garlands, and tied it around the jar lid. They are made of coated wire, so they bend very easily.
And that is about it. So many ways you can really go about making these cupcake candles. I could have even put one of the cupcake, paper liners in the rusty lid too! I will on my next one.

Hope ya'll liked this little idea for the votives.  And remember, if you don't have the candy corn ones, just take the white, plain ones and paint a stripe of orange and yellow and BAM! You got'em.

See ya'll next time!
~Lisa