Pages - Menu

Apr 4, 2015

DIY Primitive Watering Cans

I've been in the mood to do some summery crafts now that Spring is here.
So today I'd like to show you how I re-made some old plain watering cans.

Here is the before photo
Before
 I won at an auction for only $2.00 each. I took a total of 3 cases of 4, getting 12 cans in all. So total spent was $24. I'm going to price them for $11.99 each and hopefully if they all sell, it will pay for my months rent in my Booth#555, which is $120.00 plus a 4% fee.

Keep in mind you can use any cans that you may have or even look for the cheap ones at Wal-Mart or the Dollar Store.

 They were cute as they were in the blue and white speck, but having so many I needed to change a few up.

So I started with some regular craft paint from Walmart, the .88cent bottles.
Give them a good coating. For the first few I chose the burgundy red:
I left that cute rusty spot showing through some. I liked it.
Then I picked through my drawer of primitive stencils that I bought from eBay.
My favorite ones are the Old Crow and the Stars.
It's so rough. I have used this same stencil for years.
I put on the stencil paint with a makeup sponge.
Start with a small dab of paint. It's best not to get it very wet at once either, or the paint will bleed under your stencil. So less is more really!

I used a few different of my stencils and here's some pics of the first set:

And then I wanted to make up some in different colors and here they are.
For this one, I mixed up some gray, dark blue and little bit of black and some off yellow and came up with the base color that kind of looks like old metal. 
Then I took some red and dry brushed it on to make it look like old rust:
 So far this is my absolute favorite one!:
And then on a few I took some different kind of paint that I found at BigLots for around $2.49 and painted a few again that I didn't like how they had turned out.  It is a gloss red:
I like how these dried a deeper red and with a touch of shine!
And here's a few pics of all the rest:


I ended up keeping one with a star and glossy finsish for my front porch.
I put a vine in it and I think it looks kinda cool.


These watering cans are available in my 
$11.99 each
and I might upload one in my Etsy shop.

I hope I didn't price them too high, but they are metal.
Happy Crafting Ya'll.

Apr 3, 2015

Primitive TOBACCO STICK FENCES


I have been making these cute little fences out of tobacco sticks for a few years now.


I'm gonna show you the basics of how to put one together.

Here is one all plain, just the tobacco sticks:

Simple as it looks.
Just lay out some tobacco sticks, cut them in the lenghts you want and then nail them together.
I use a nail gun so that it goes by faster. And these tobacco sticks are a hard wood.

And then you just start to decorate them however you want.
Here are a few that I have recently made and sold in my 
Booth#555 at the Peddlers Mall.

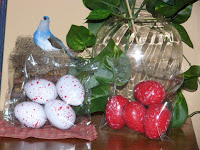
 Look close, I used a Blue Willow tea cup as a birds nest and put a red speckled egg in it that I made here.
CLICK HERE TO SEE HOW

I wired it on with craft wire through the handle.

 As you see, I just lay them out and make a variety of types and sizes.
You really can't go wrong with this craft!

Here's a photo of a few of them in my 
Booth#555 at the Peddlers Mall.

These tobacco stick fences are $9.99 each in
my  Booth#555

Thanks to ya'll who've been buying them!!

Happy Crafting Ya'll!

SIMPLE GARDEN TRELLIS


Two flower boxes at the bottom of each also is cute.
Here's a look at my very simple garden trellis. 
And best of all, cheap and easy enough to complete in just a few hours!


It started out as an idea and a spot that I thought I'd love:
Then here it was after a about an hour:
Framed with treated landscaping timber is a cheap and sturdy way to do it!
Then a couple hours later and it was finished.
Add some 2x4 braces to the sides and then a bit of wood trellis for decoration and for climbing of flowers.

As you see it was really a very simple structure.
Two flower boxes at the bottom of each also is cute.

Here it is in the new and final spot:
Photo taken in August of 2014

As you can see, it's getting a bit weathered now, but still sturdy!

Oh, the main reason that I wanted this moved to where it is now is because it now sits up on a bank behind these beautiful barn wood corner fences that he also made:
Straight up the bank, in the shade. Hard to see though from this pic. 

And now it seems to all be coming together nicely!
I can't wait to start planting some more flowers soon!

See ya'll next time,
~Lisa 

End

Apr 2, 2015

DIY Primitive GRUBBY Stars


Since I sell tons of stars in my Craft Booth#555,
I often get tired of the same old look.
So I wanted to grubby some of them up for sale.

I started off with a plain metal star. Well, like this one.
I think I used a variety of colors and made a bunch of these, not sure which one was which for the pics:

And next just simply paint on some Mod podge or Elmers Glue as a base coat:
Either is fine:

Then next just simply start sprinkling on some ground cinnamon while the base is wet.
Put a lot on and cover it good.

Shake off the extras and let it sit to dry.

Repeat this process to cover as much of the star as you like.

Sometimes a little looks awesome and sometimes I do a few layers.

Finish up with some craft paint sealer or a finishing coat of mod podge or elmers glue.
It all does about the same and keeps the cinnamon in place from falling all over the place.

And that is that!
Easy and cute!

These are for sale in my Craft Booth #555
for $3.99

Thank Ya'll!

BATTERY OPERATED FLAME TIP LIGHTS | CRAFT FAIR LIGHTING

I took some clear silicone (the higher priced one, not the white caulk kind) 
and mixed in some cinnamon spice in a throw away bowl.


Just mix it until it's a nice smooth brown color. No real recipe here. Just play around with it. 
It should look something like this:
 And that is about all to the mixture.


This is the little strand of red, round lights, battery operated that I bought at the DOLLAR MART for only $1.00
Awesome already but not very primitive looking:

I took each little bulb and hand dipped each into the mixture.
A quick fast dip is the key to getting the cute sharp tip.
Then, I clipped the string of lights up on my patio umbrella using clothespins for them to dry.

And once dry this is what they looked like:

These turned out super cute.
I wish I would have taken a photo of them in use.
 
I had put them in my craft Booth #555 on top of the fireplace logs.
They looked awesome until they sold.
$4.99
Thank you!

Apr 1, 2015

TOBACCO STICK SHUDDERS


Here are the tobacco stick shudders up close.


Primitive Tobacco Stick Shudders

These are shudders that I made out of tobacco sticks.
Don't know what tobacco sticks are? Click here.

Since I have so many of them handy and they make for awesome primitive crafts, I've been trying to use them in all sorts of ways.

And these cute primitive shudders turned out pretty cute.
All you need to do is basically lay them out in a line, kinda find the straightest ones then cut to same size. It only takes about 5 wide.
Next, just take a piece of the cut off sections and lay them sideways on the front to kind of brace them all together. 
I had my husband take a nail gun and sink the nails way in so that they aren't seen much from the front.
On the back though, you will have to take wire cutters and cut off the rest of the nail that punctures through.
Attach a sawtooth hanger and that is it!


I went ahead though, and added some pieces of grapevine to the fronts.
It just makes it a bit more prim.


Then I painted up some stars to add a dash of color to them also.
I attached these to the fronts with craft wire.


I threaded it through the tiny gaps in between the tobacco sticks.


Here is another set that I did in a reddish color.


I tied on a bit of homespun fabric to these just to make them a bit different.


On another set that I forgot to mention. I ended up dry brushing on some black paint to the tobacco sticks.


It looked a lot cuter in person though.

Here they are up on the wall in my Booth:

Super easy and cute prim decorating props here!
 Hope ya'll liked them!

These are for sale in my Booth#555
$15.99 a set

Happy Crafting ya'll,
~Lisa