Sep 6, 2016

CHEAP FURNITURE MAKEOVERS from AUCTION FINDS

Before and After of a $2.00 chair.
Here is a quick post just to show a few pieces of furniture that I recently made over.
Here's a before pic of a chair that I had won 2 of for only $2.00 each. 

And here as you see above, I'd already added one star before remembering a before pic. But you get the idea.

I just stenciled on a star for one, 

then touched up edges here and there. 
And then just finished it with a brush on varnish sealer from Folk Art.

 And I basically left it like that for one.
And here's the back of the first chair.

And oh yea, I had won the little desk also for either $2 or $5, I can't find the ticket.
It was a shiny Oak color. But I sprayed it with ALMOND by Rustoleum also.
 I also made over the plain green trash can with a star too.
I didn't take a before pic of this because it was only solid green. All I did was add the stencils and brush strokes.
Here is the desk a little closer again.
I added some cute sage green check fabric to the inside of the drawer also.

The other chair I completely spray painted in ALMOND from Rustoleum paints.

Then went back and added more stenciling.


This is by far my favorite.
And I did finish this off with the same varnish sealer also.
  I love the old, true cracklings that show through.

 And take a look at this.
This is a great load of stuff I recently won from a local auction. None of the pieces shown cost me over $7.00. 
In fact, the chairs are the only thing that was $7.00. 
Before and after pic of a $2.00 end table.
The pumpkin light (works) was $2.00,
 the quilt rack was $5.00
and the red vintage metal lamp (works and heavy) was only $6.00.
It was a great night!
My proudest item of the pic is the solid wood end table in the front, far left. 
Why? Because it is solid wood, well made with good bones and it only cost me $2.00!

I guess the reason no one else wanted it was because it was just the one end table by itself and not a pair. That didn't bother me, because I knew I wanted to paint it and redo it anyways.
I choose a colonial red spray paint from WalMart in the Rustoleum brand. 
It runs a around $3.98 a can. And one can is all I needed for this size table.
Here's the before and after again, side by side.

Not shown in the last pic, but I went back and added a country star to the middle of the table in okra yellow.

But by far my favorite furniture makeover of the week was this chair:

I gave $2.00 each for these chairs. And afterwards, I put $14.99 on the one with the old crow and
$9.99 on the more plain one with the star.

And that's what's been keeping me busy these last few days that I haven't been posting much.
And all of this shown is in my craft booth at my local co-op.
Which makeover was your favorite?
See ya'll next time,
-Lisa

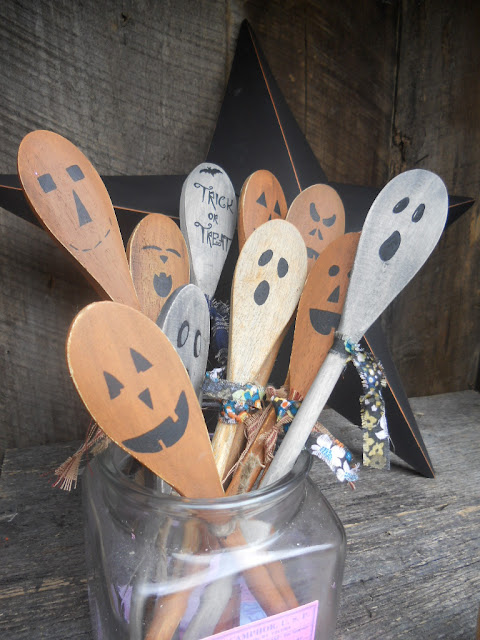
HALLOWEEN MASON JARS with Wooden Pumpkin Spoons


Hey ya'll!
Here's a Halloween themed idea for those plain ole' Mason jars you may have.  And if you don't have any on hand, Walmart and even the Dollar General stores carry them in cases.
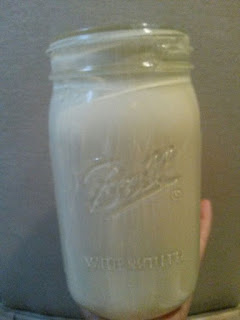
Plain jar before
The Halloween themed Mason jar looks like it has a lot going on. Really it was pretty simple.

Okay, so first off we need to clean the outside of the jar with a little bit of alcohol.  This will remove all dust, lint and crap so it will have a good, sharp finish.
I just wiped it down with a paper towel dipped in the alcohol.

Okay then just paint the inside of the jar a color you want to pop. I choose the Cinnamon color from Folk Art craft paints.  

Oops, this is a pic of another one I painted Cinnamon on the outside. But anyways, just paint the orange on the inside if you are going for the look of my top pic, or vice versa if for another. 

And for the outside I went with antique white.

Okay, I've switched up the pics somehow of the inside and outside, but this pic shows the white inside. But remember you want the white on the outside if you want it like the jar at the top of this page.
For some reason I've vice-versa'd the pics.

Okay, anyways, after you have painted a good coat on the outside in white, and its dry, take some fine grit sandpaper and sand it. 

And you'll start seeing this.

I like all the scratchy type marks.
And wipe all the dust off then add one coat of sealer. I like the varnish in satin.


And let it dry then decorate it with burlap strips, a bell

                        
      and some of my pre-made  


And here it is finished:


And here's the other one I just finished up.


See ya'll next time,
~Lisa


You may also like:

More Mason Jars in the Halloween Theme

 LINK TO HALLOWEEN WOODEN SPOONS

Sep 4, 2016

MASON JAR STAMPED GIFT BAGS


Time to spruce up those plain ole' gift bags you got on clearance last year.  Here's what I recently done to a bunch. I made them into Mason Jar Stamped Gift Bags.  Mason jar anything really catches my eye and I hope they do the shoppers at my local co-op also.

Here's how the Kraft bags originally came in both green and red. The price says $3.00 but I got them at the Christmas clearance at Big Lots for 75% off.  Woot woot!

I got them for 75% off at the Christmas Clearance sale.
As you see above, I just got out my big and little Mason Jar stamps and black ink and started stamping.


I didn't have an exact idea in mind, just to stamp.
Some of them, as you see in the back, I stamped on the words, "Thank You," in case someone is using the bag as a thanks gift.

Really simple way to spruce up those plain bags I think.  And anytime I can use my Mason Jar stamps, I'm ready!


The green ones are larger, but you can't really tell from this pic. I did get two different sizes.

And to finish them off, I took some jute string and a Manila tag and tied one on each.
Ready for someone to write on.


I'm gonna tuck these in at basket at my local co-op craft booth, beside my Mason Jar crafts.
I'm thinking maybe pricing these for .99cents each? Not sure yet, but I'll give it a try and see how it goes.

Happy Crafting,
Happy Crafting Ya'll

Aug 31, 2016

DIY WAX DIPPED GRUNGY CANDLES


A while back at the auction house, I won four large totes of nothing but candles. I mean little candles, big candles, tea lights and all. I gave $7.00 per tote. Just take a look at these totes below.


Seriously, there's layers of candles in each. So I know I have enough for crafts for a while.

So to get started selling some for profit from my $7.00 totes, I decided to grungy up a batch of them.
I've done it a few different ways before, 
 ROLL in melted wax method


 Modge Podge Method

  
But this time I wanted a faster way, so I decided to use my candle warmer and an old candle to just dip these in. This will give them a smooth and grungy look.

Oh, I've done this dipping in wax method before with the cinnamon, grungy candy canes too!

 WAX Dipped Candy Canes


But now onto the Wax dipped, grungy candles.

 Just dip the candle down in the melted wax,


 then give it a quick roll in some cinnamon.


And dip it again to set the wax in!


Then just sit it on some wax paper to dry.


I repeated the process on some to give it a more grungy, primitive look. Others I didn't.

And that's it.
How super simple is that?  And I think they look super cute.

Here's a few more pics to see how different the colors turned out.
Oh, the candle in a jar that I melted to dip these in was a Fall scented candle, (I can't remember the name,) but it was a melted dark brown.


 I even dipped these long, skinny ones.  But I had to dip one end at a time to get it all coated by using the dipping wax jar.

Remember, if you're gonna use the jar of melted wax also,
just DIP, ROLL and DIP again to set it in.
That's it!

Sorry, right now I don't have any pics of these packaged up. But I think I'm gonna price the votives a pack of 2 for $1.50 or so.  
The grungy tealights maybe 4 for a $1.50 and the tall skinny ones probably 2 for $1.50.  
However I do it, I'm sure to make tons of profit from my $7.00 totes!

Hope this gives ya some ideas and
Remember to Subscribe so you don't miss a post