Aug 23, 2016

HALLOWEEN THEMED MINI MASON JARS PLUS PUMPKIN MAGNETS


I've really been in the Halloween/Fall mood this week. And these Halloween themed Mason jars with Pumpkin magnets are a great way to give treats without the use of bags.

Or just a fun way to spruce up any area with a bit of primitive Halloween fun.
And as a bonus, the top, 

the pumpkin face is a refrigerator magnet!


Okay, so on to how to make these.
I stained my jars on the outside, here's the link to how I do that.
 I do the staining because I am in love with various colors that are hard to find.

Here is a pic of my orange, hand stained jar:
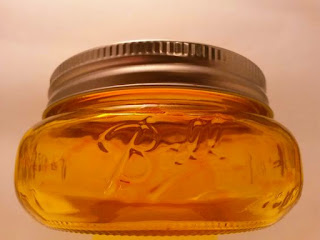
CLICK TO SEE HOW TO STAIN MASON JARS
 
But I'm sure you could just paint the outside of the jar with a sponge and some craft paint if you wanted. As long as maybe sealing it with a clear coat to save from chipping.

After that, I just got out some craft paint in browns, and painted the shiny lid and ring. 
 The one that will screw onto the jar, not the pumpkin magnet.
I like the burnt umber color a lot.

And then I tied some jute string around the jar with a cute, hand stamped tag. I chose BOO.
 Here it is with the painted lid on it. I had to do two coats of burnt umber.

And then I just stuck on the Pumpkin magnet lid to the top of the jar lid.


And this is how they turned out:
As you see, I also glued a bit of homespun fabric to the pumpkin magnet lid, along with a cute button.
I also added a bit of cinnamon on top of the face, which I sprinkled on top of some Elmers glue. Just to get it to set in.

They are all ready to stuff with candy. 

And remember, since I stain the outside, these jars are food safe.  And since the stain is baked on, they are even safe for washing. Though I'd avoid the dishwasher just in case.

Hope ya'll like these little mini mason jar all decked out for Halloween!
See ya'll later,
-Lisa


SUPPLIES:
I buy the mini Mason jars at Walmart in the canning section.
And the magnets and craft paint I also get at Walmart in the craft section.
The jute twine came from the Dollar Mart and I made my own handstamped tags from the plain Avery tags I found online at eBay.
The swatch of fabric came from my oodles of fabric I've saved over the years. ;-)

Aug 22, 2016

HARVEST WELCOME BOARD


Yesterday I spent the evening making a "porch board." It's just a tall sign that is meant to stand by your entry, out of the way, to welcome guests.
Since Fall is on it's way, I thought I'd make one to say "Harvest Welcome," to place in my new booth.

Here was my plain old wooden fence board before and after:


I ended up using the other side that didn't have the light colored streaks. First I took some cinnamon orange colored craft paint and a wide paint brush and started to freehand the letters.

I didn't know how much space I'd have in the end, but I started by doing the first word, "HARVEST."


And I knew if I did have enough room that I wanted to also write "WELCOME" to the end, for "HARVEST WELCOME."
Most people will lay it out, but I just don't really take the time for that anymore. I knew I could always cut it off the bottom if there was too much room left, or fill it in with something.

Yep, that's a hammock on my side porch. I love it there. lol
The wide paint brush makes it easy to freehand these type of letters.

Or if you don't fell good with free handing  them, print you off large letters using Word in whichever font you like and just trace them real hard onto your board to give you an outline.

CLICK HERE TO SEE AN EASIER WAY TO TRANSFER WORDS TO WOOD

After the wide orange letters were done, I went back in with a country tan color and outlined a fine line around each letter.  I used a very fine tip paint brush that is actually meant for decorating nails. It works perfect.

Once it was all painted it, I did have some room at the bottom left over but not too much. I decided to just draw in a pumpkin to fill it in.


And there's some grapevine garland I was about to use also to trim it up.

Look how cool the grapevine twirled up at the bottom to form a cute little pumpkin!
 I left the extra hanging as a stem also.

Here's a shot from the side, hard to get a good pic cause the board is so long.


As you see, I just ran the grapevine garland from the top down the sides and to the bottom.

I loved how the grapevine was making it look that far.

And here it is sitting beside my door:


I like how it takes up that empty space that really doesn't have much room for anything else.
And now seeing it sitting there, in a pic, I think I'm going to go back and add a touch of burlap to the top.

Here's a few other pics of how I've started decorating the porch already. Since we had a bit of a cool down spell yesterday, it has really gotten me in the mood.


I'll probably keep this porch board for myself, but I'm off to make a few more in the same theme for my booth right now. I think I will probably price them for $19.99 each.....or um, maybe $15.00.

Anyways, hope ya'll got some sort of idea from this post.  And now I'm off to add a bit of burlap to the top of the board someway.  After seeing the pic here, it looks like it just needs something there.
Happy Crafting,
-Lisa

Aug 17, 2016

MASON JAR MAGNETS Jam and Jelly


I'm in love with anything Mason jar style!  And I've made various Mason jar magnets before, (links at end of this post.) And for all ya'll out there that are too, here's another Mason jar craft, refrigerator magnets.

I had won this set of 12 down in a box lot of wooden craft supplies at the auction for somewhere around $4 or $5. And I really got my moneys worth. It is still full of items.

You can find these at Walmart for $4.48 or any craft supply store.

These are actually wooden tags meant to be used for gift tags I think. Or to tie on to Mason jars when you give them out.

 They come in two sizes, 6 large and 6 small.

First, I just laid them all out.

 Gave them a first coating of paint to try out colors. (Which the blue I hated by the way!)
 The red I was really liking.

Then I got out my antique white and a stiff bristled brush (a toothbrush works best) and spattered some paint on to give that cool spatter wear look.
  I was now starting to like the blue a little bit more.

 But as always, red and white is usually my all time favorite.
 It's just so country looking to me.

And then I got out my fine paint brush and starting dabbing on some label looking words.
Thinking along the lines of these being filled with jams and jellies.
 And of course, being as how country I think, I had to write FARM FRESH EGGS on one:
 Then just stick in some fruity looking dabbles.
I did a strawberry, blueberry and a grape below.


 Ready for the magnets now.

These are the magnets that I really like.
  And with refrigerator magnets, I always use the E-6000 glue found at Walmart. It makes a super strong hold that lasts forever.
 Just glue it on and let them sit a while.  This glue does require about 24 hours to get a super strong, forever hold.

But after sitting overnight, I usually go ahead with the project.


And to top off the fronts, I went back and tied a bit of homespun fabric in a tiny knot to cover the hole. Just glue it on.

And here they are ready to be packaged up:


These turned out pretty cute, I think.
Here they are in the packages.

I made up the packages out of bakery bags, tags printed on Avery Print Online:

 and scrap booking paper backs:
I placed a bit of tape over the cutout to keep the magnets in place


I might price them for around $1 each or maybe $1.50 each? I dunno yet.


And here's a variety of items I have all packaged up and ready to go with them.
Notice the larger Mason Jar Magnets at the bottom of this photo.


See ya'll soon,
~Lisa

LINKS to my other similar projects:

Mason Jar Stamped Magnets

Mason Jar LID Magnets

Mason Jar LID Pumpkin Magnets